How to set Administrator privileges and restrict guest user to use certain program in Windows 10
Author: hasanuzzaman
Published in: Operating System


As technology is evolving, we are experiencing huge changes in our systems, and networks. More advanced and powerful systems have been introduced and hence, increased our operational capability and decreased processing time. In contrast, these advancements also pose a security threat, as our systems have become more valuable towards these threats like hacking, viruses, and leakage of confidential Data.
Security of Networks and Computers in offices and companies are one of the essential things everyone must be assured of. As there are several computers in every office, the owner or administrator always wants and need to have a significant grip of all the security.
In this article, we will show the step by step process of the following essential topics:
- Administrator privileges.
- How he can add or remove accounts.
- How many other user could be made an admin.
- How admin could restrict Users or guests from accessing certain programs and files.
1. Administrator privileges.
Starting from system admin, usually when we install windows, the first account from which we log in or the account which is used to install windows if the “System Administrator” account. This account has the highest privileges and rights to the system and can be used to implement any change in the system like “add or remove program”, “block users from certain programs”, “add new accounts”, etc.
If you want to make another account an admin, like guest account, system users, etc. follow these steps:
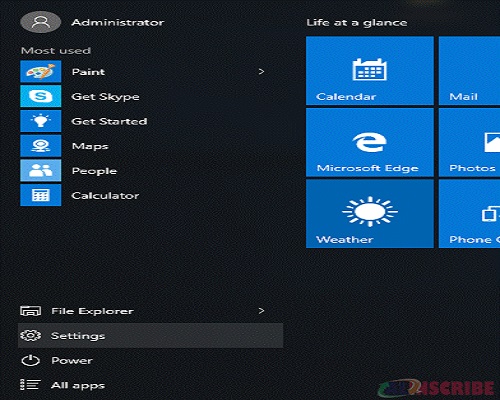
1. On the desktop, click on the Start button to open the Start menu, and select Settings.
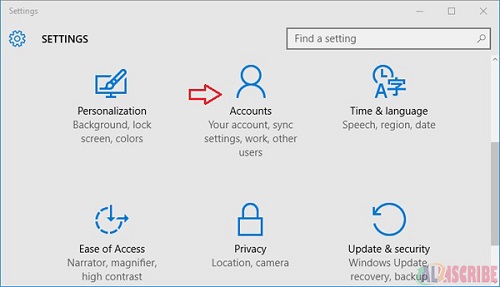
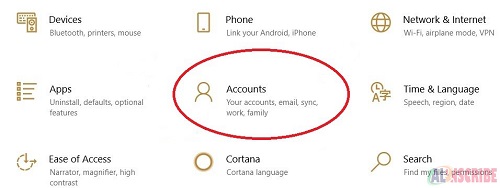
2. In the PC Settings menu, Click on Accounts.
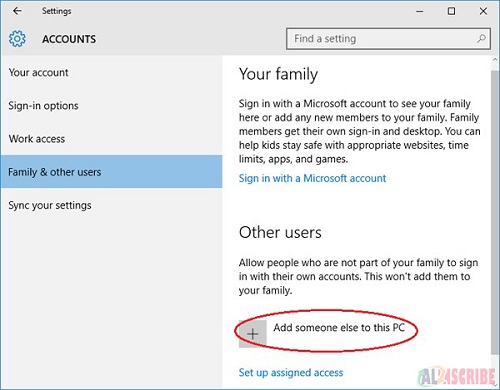
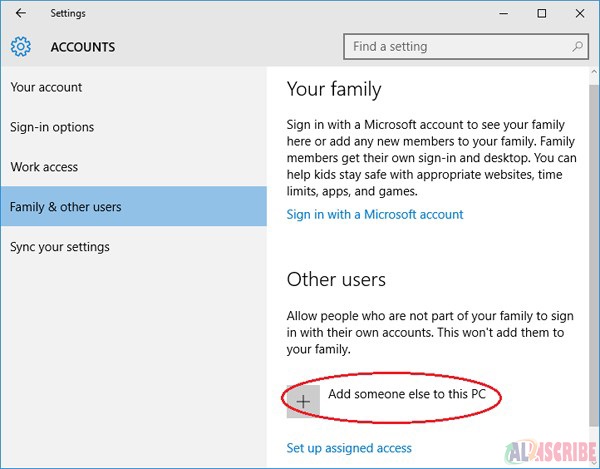
3. On the left panel, you will find Family & others users tab. Click on it, and in the next step, click Add someone else to this PC.
4. After clicking that, you will see the menu of all the accounts created on your PC. Select the account you want to make admin and click on “change account type”.
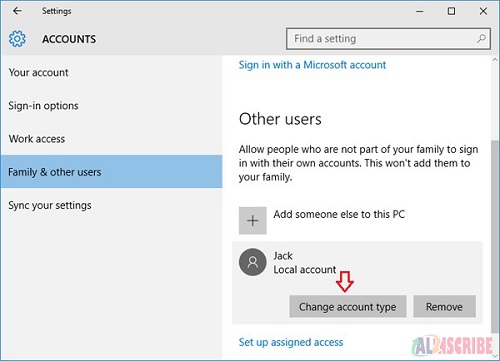
This command will lead you to another menu, from where you have to select account type to “Administrator” as shown:
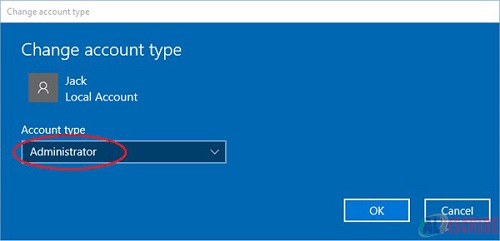
Finally, after selecting and “Administrator”, click “OK” and the selected account will now have the Admin rights.
2.How to add or remove guest accounts.
Adding Accounts:
In large offices, one computer is being used by several employees and the number of employees may vary. For a new employee, the Admin has to allocate a new account, while for the outgoing employee, his account may have to be removed.
In the following steps, we will show how to add or remove Guest or User accounts.
1. Open the Settings.
2. Click on Accounts.
3. Afterward, Click on “Family and Other Users”. Here you will have an option: “Add Someone else to this PC”.
4. After clicking, you will be guided to the following menu:
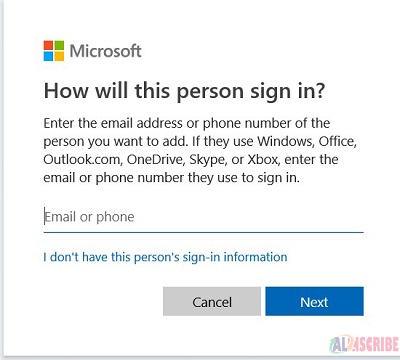
You will have two options:
- If you have the email and Cell no. of a new user, enter all the relevant information and click next and Finish.

Afterward, the new user will log in using his Microsoft email and password.
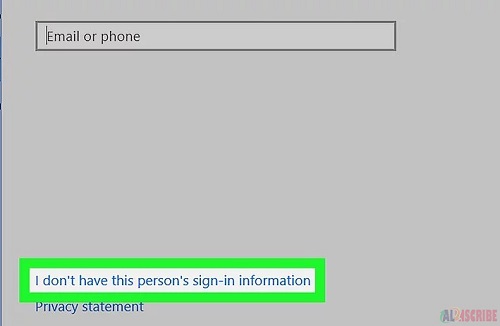
- If you don’t have access to the new user’s email/password, or he may not have one.
For this, you will have to click: “I don’t have this person’s Sign-in information”.
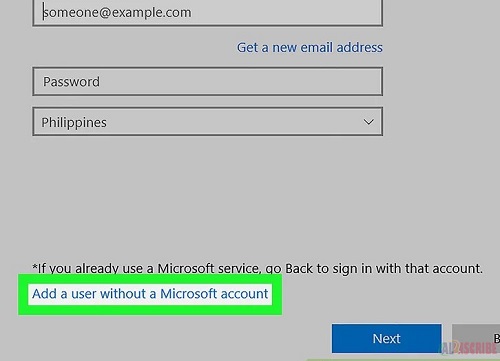
In the next step, the system will ask whether the user has Microsoft account or not, just click: “Add a User Without Microsoft Account”.
In the next step, you will be asked to add all the necessary information on new account, e.g. username, password, etc.
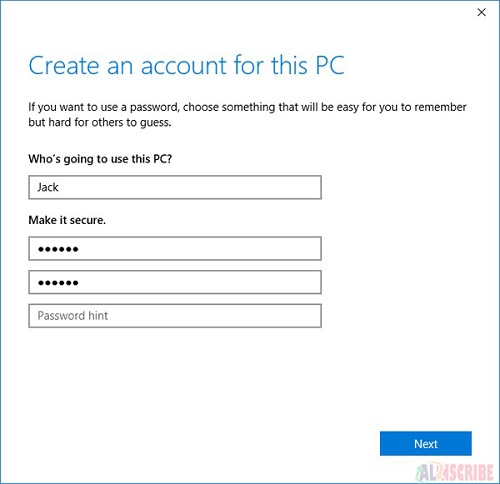
Enter all the information and click “Next”. Hence, your new account will be created.
Removing Accounts.
Earlier, the method of finding the created account was described. Now we will discuss, how to remove accounts.
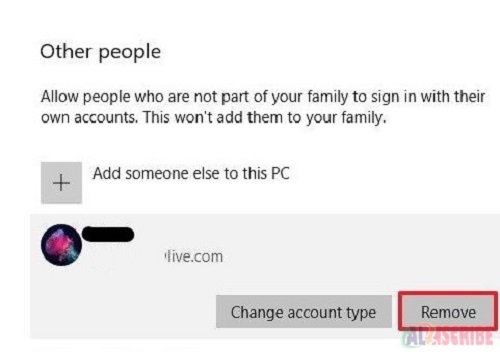
1. In the accounts menu, click on “Family and Other Users”.
2. Now select the account you want to remove, and click “remove”.
3. The system will now confirm from you.
4. Think twice, and if you finally want to remove the account, click: “Delete Account and Data”.
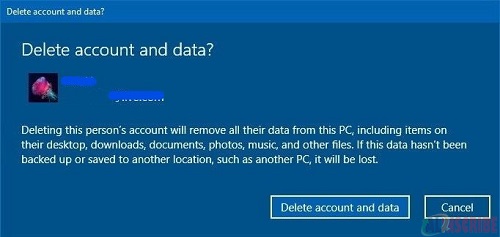
Caution: This will remove all of your data in the selected account permanently.
3. How admin could restrict Users or guests from accessing certain programs and files
Our last and most crucial discussion will be about the method, of how the admin can block the “guest users” from installing/uninstalling the new program and give limited access to the users for certain programs and folders.
1. Restrict Users from installing or uninstalling new programs.
We will start from, how we can restrict guest users from installing or uninstalling new programs. Surprisingly, “Windows 10” has by default restricted all the users other than admin from installing or uninstalling new programs. This is one of the Windows 10 new security features, which we discuss sometimes. So, no need to worry about this.
2. Restricting users from accessing any program or folder.
For better understanding, we will show you by having two guest accounts. i.e. “Account 1” and “Account 2”.
Let’s say, we want to give access of “Google Chrome” Account 1 and Block Account 2 from accessing it, do the following steps.
1. Login from Admin account.
2. Right-click on Chrome and select Properties. You will see the following menu:
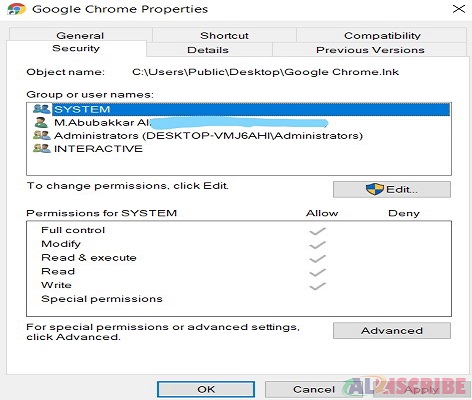
Currently, we haven’t added to new users, i.e. Account 1 and Account 2, to the Group. That’s why only the Admin account is being shown. To manage or restrict them, we must add them here.
3. To add them, click “Edit”. And the following menu will appear:
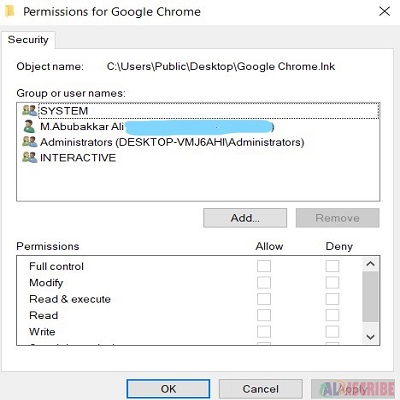
4. Click on, “Add” to add the desired user.
We’ll see:
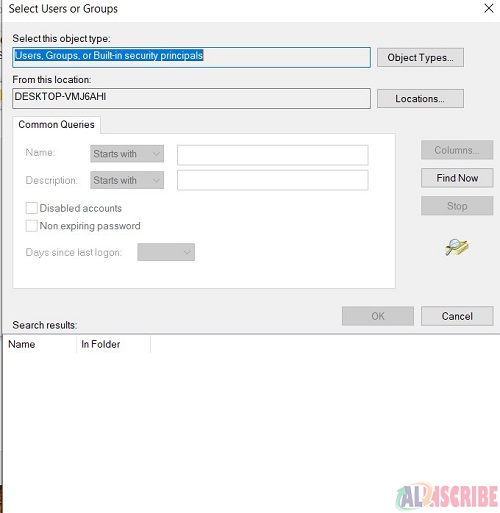
By default, there will be no Users visible, so we will have to click “Find”.
Afterward, the system will show all the current users, and we can see the desired users.
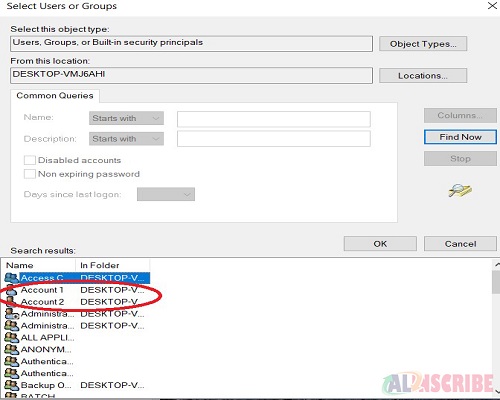
5. Click on the account i.e. “Account 1” and click, OK. (Repeat the process for “Account 2 also)
Now, we can see the newly added account to the group.
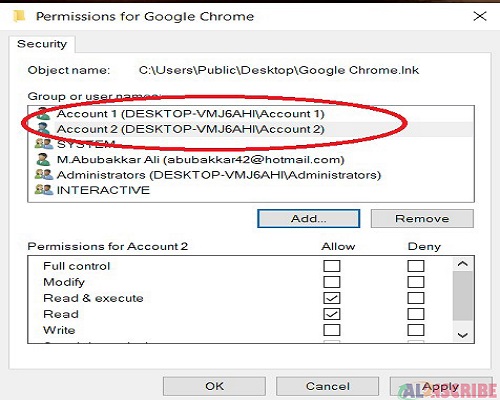
In the above picture, we can also see the permission we want to give to a certain account.
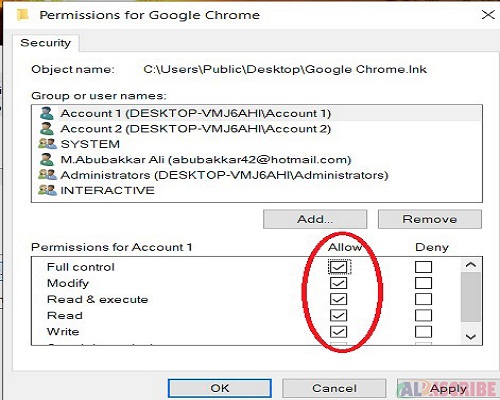
6. Here as we are allowing “Account 1” and restricting “Account 2”, click on “Account 1” and check all the options below “Allow”.
7. Similarly, for “Account 2”, check all the options below “Deny”.
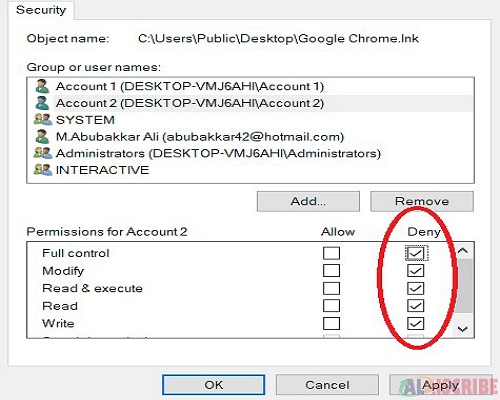
Hence, this will allow “Account 1” to access Google Chrome and restrict “Account 2” from accessing it.
The same method can be applied for Folders, Hard drives, etc.
Hope you people liked our article and have better and clear understanding of each step.
Article Comments
Similar Articles
Articles Search
Sponsor
Featured Articles


Most Popular Articles


Article Categories


There are zero sub-categories in this parent category.
There are zero sub-categories in this parent category.