A USER GUIDE TO MAKING PRESENTATION USING PREZI


Presentation got easier, captivating and appealing with the advent of Prezi presentation tool. Prezi as a tool for presentation is cloud based and makes use of a ‘’zooming user interface’’ (ZUI). This helps in making otherwise lackluster presentations come alive by its chronological story telling sequence.
With a Prezi presentation you can capture content spatially and to engaged more audience sync with the presentation.
Let us now attempt a panoramic view of how you can optimally use Prezi in making presentations.
Getting Started:
Before you can start using the Prezi tool, it is important to first create an account. At top sites new accounts can be opened or created. Accounts are essentially of two types- the paid account and the free account. The paid account however allows you more flexible usage as it concerns storage, privacy and allows offline access to the Prezi Presentation tool.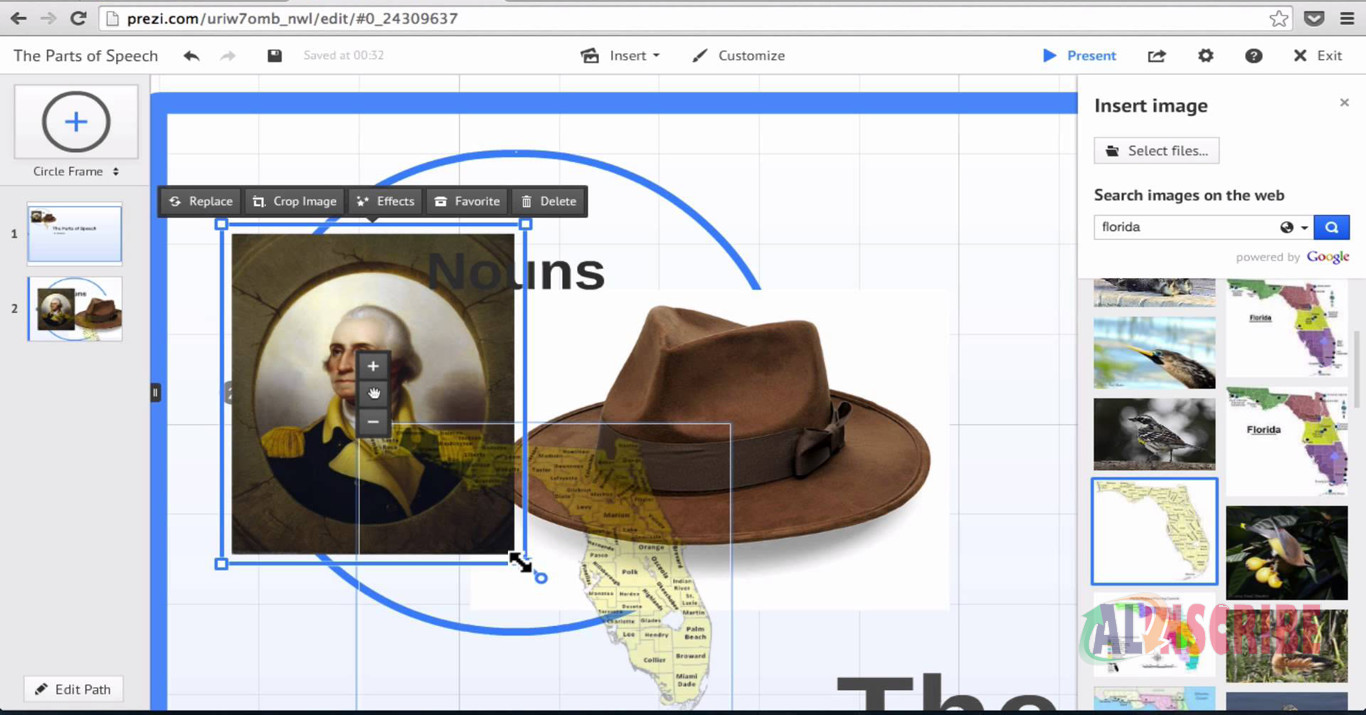
Creating a Presentation:
Once logged in, creating your Prezi Presentation is the next logical step to take. And to do this, you should click on the Prezi tab. This then brings you to the environment where you can save your work (Prezis). Click on New Prezi, and then enter a description and a title for the Prezi. Afterwards, click again on New Prezi. You can double click on the empty platform to begin typing. Also you can edit the width of your text by dragging the arrows situated on the tool bar’s right hand-side. To have an image inserted, click on insert- this is located at the wheel’s menu. You have the option of either uploading an image or drawing a shape. Here you are presented with three options for drawing shapes.
Basic Menu:
The next page you see is the canvas upon which you will articulate your prezi together with user friendly tools. These tools are:
• Click and drag
• Magnifying glass
• Main menu tool bar
Printing:
To print a Prezi, it is advisable to convert first to a PDF document before printing is done. In printing your Prezi, an entire path step will become a single page on PDF. A Prezi can be printed through the Prezi software for Windows/Mac and also through the online editor.
The printing process begins proper by selecting the icon marked share on the menu bar. When Prezi is through with the conversion of path steps to pages, you will then get a prompt requesting you to save the presentation. After you are done with clicking on Save PDF, a prompt requesting you to name your presentation will appear, together with a prompt as to where the file (PDF) should be saved. When you have successfully saved your Prezi presentation as a PDF document, you can now print. This you can do by using Adobe Reader or some other software that allows PDF.
It should be noted however that your PowerPoint presentations, can equally be imported and transformed into an engaging Prezi presentation.
Article Comments
Articles Search
Sponsor
Featured Articles


Most Popular Articles


Article Categories


There are zero sub-categories in this parent category.
There are zero sub-categories in this parent category.